The easiest way to create an invalidation in the Amazon AWS CloudFront API
First method: (manually) by AWS web interface (easy)
Normally, to create an invalidation (clear cache) for a cloudfront distribution, you would:
- login to aws
- click "Cloudfront" service
- click a distribution name
- in top menu for that distribution click "invalidations"
- then click "create an invalidation"
- and there you can specify the path to clear cache for, e.g "/landscape.jpg"
Next I will show you how to do the same thing automatically from code / command line interface
You might need this for example if something updated on your site and you need to clear CloudFront cache (create invalidation) for a given url on your site without manually logging to AWS web interface.
I found that easiest way to do this is by running awscli, the official program that is provided by Amazon AWS and it comes with most Linux distributions
Don't worry, installing awscli is extremly easy and configuration is as simple as providing access key and secret key
Install aws cli
Run this in your server's SSH console:
yum install awscli.noarch
If it says it cannot find awscli (full name awscli.noarch) then you need to install epel (Extra Packages for Enterprise Linux)
yum install epel-release.noarch
Now try to install aws cli again:
yum install awscli.noarch
Once installed you can test that program exists, with command: aws --version
The single configuration step for aws / awscli is to provide cretentials, run this command:
aws configure
It will ask for AWS Access Key ID and AWS Secret Access Key. You can click enter for all the other prompts, like default region, etc.
At the bottom of this page, I included some details on how to get AWS Access Key ID and AWS Secret Access Key.
Now you are ready to create an invalidation from command line. Here is a sample command:
aws cloudfront create-invalidation --distribution-id EZD3J5ZZZJ1TU --paths "/landscape.jpg"
It will reply with a confirmation, but if you need to double check, you should see this invalidation as "In progress", then switching to "Completed" inside the AWS web interface for this CloudFront distribution.
Running AWS cloudfront invalidation command from PHP code
If you need to run this command from PHP, you can do this with PHP exec() function.
First, you need to specify the credentials by "export" before calling the aws program, because in PHP environment, it will not be able to automatically detect the configuration of aws cli.
Secondly, it's a good practice to use full path of bash commands (otherwise PHP or crontab environments might not find the commands), for example, first run which aws to get full path to aws cli program, in my case it returns /usr/bin/aws, then use that in PHP.
<?php

$aws_credentials = 'export AWS_ACCESS_KEY_ID=12345; export AWS_SECRET_ACCESS_KEY=6789; ';
exec($aws_credentials.'/usr/bin/aws cloudfront create-invalidation --distribution-id EZD3J5ZZZJ1TU --paths "/landscape.jpg"', $output);
print_r($output);

?>
Getting AWS Access Key ID and AWS Secret Access Key from Amazon AWS
Amazon recommends to create a special user for each function and avoid using your default / root keys in your applications.
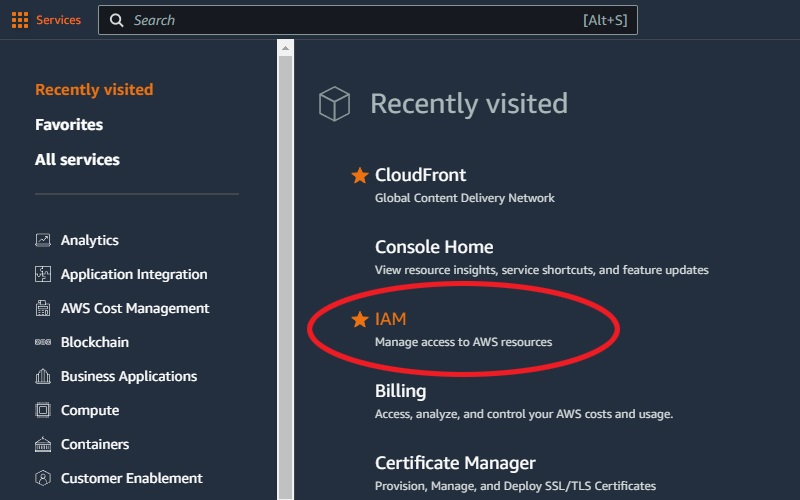
On AWS web panel interface I went to "services" and open "IAM" Manage access to AWS resources
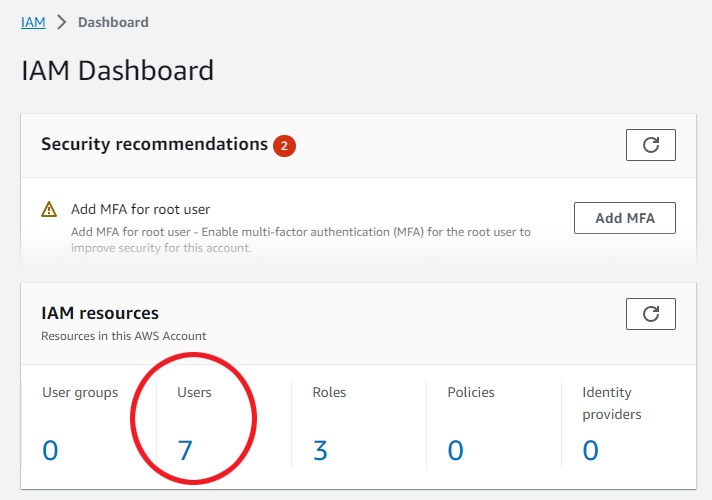
On IAM page, there is an area called "IAM resources", click the users:
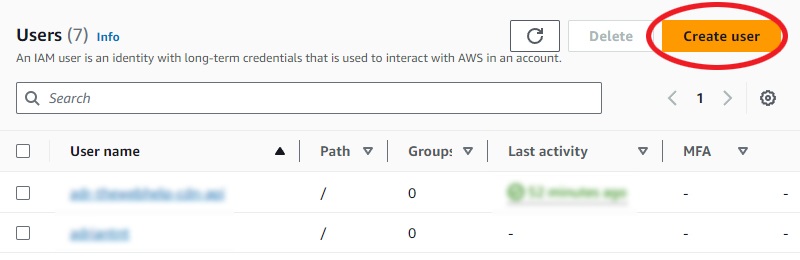
click "create user" on top right corner:
Under username I wrote something like cloudfront-user-for-example-site
No need to check "Provide user access to the AWS Management Console", not for this cloudfront invalidation purpose.
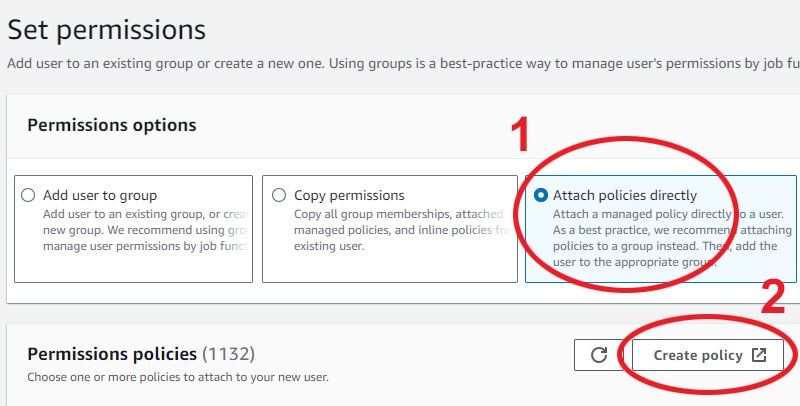
Now it will move to a page saying "Set Permissions", under "Permission Options" first select "Attach policies directly", then click "Create policy":
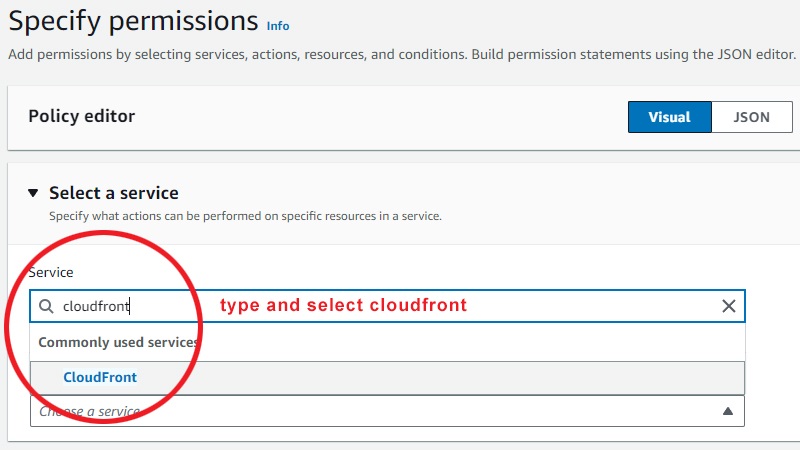
Now under the policy editor, type in and select CloudFront service:
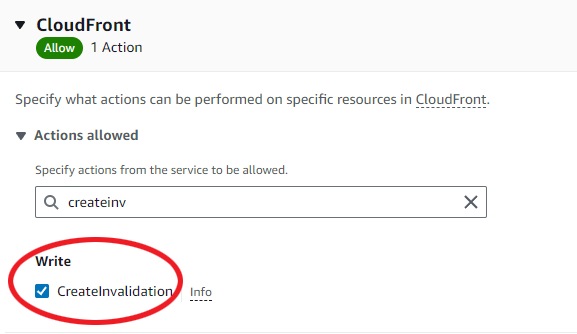
Now under "actions allowed", type in and select "create invalidation":
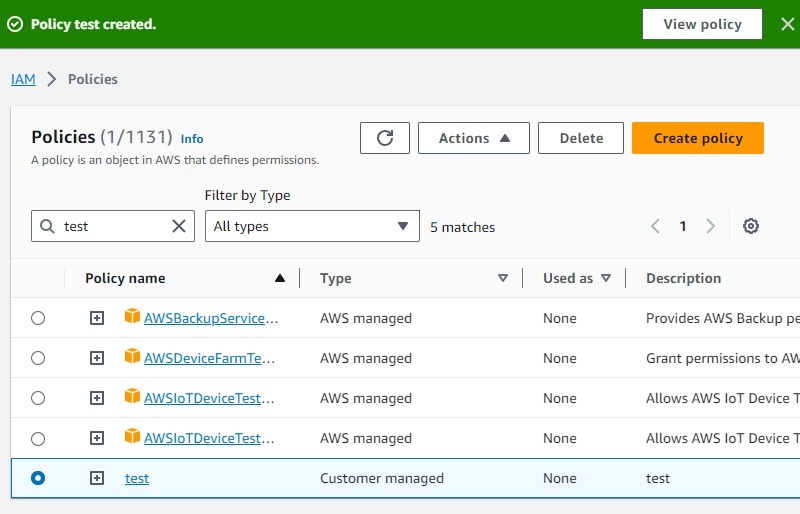
Then click "next" on bottom right corner, on next page give it a policy name and description and again the "create policy" confirmation button on bottom right corner
You will get this confirmation page:
Now you can leave this page, the previous page should have remain open in another window, the one where you selected "Attach policies directly" and "Permission policies" underneath. On that page, search and select the new policy name you just created, and click "next" on bottom right corner.
Next button should be last step saying "create user" in bottom right corner.
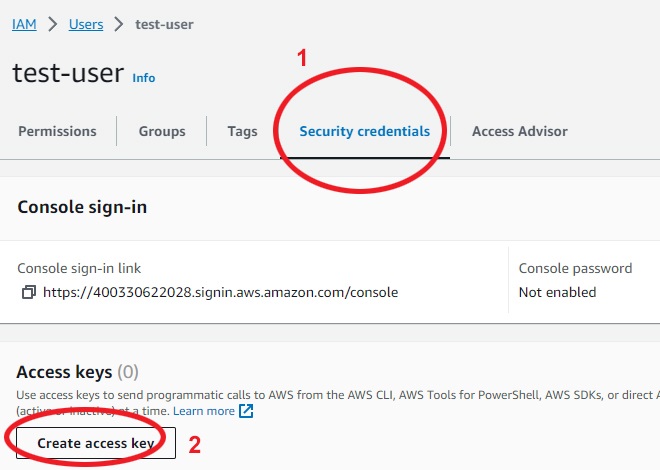
Now on the list of users, click the user you created, then under "security credentials" tab, click "create access key":
Under "use case" select "Command Line Interface (CLI)".
Lastly, you should get a page like this, copy the Access key and Secret access key:
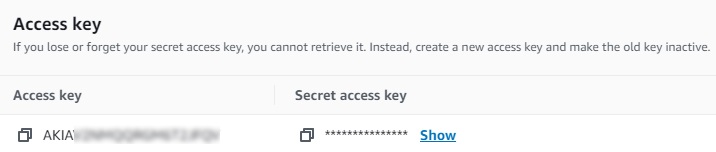
These are the Access key and Secret access key that you need during the aws configure command when configuring the aws cli mentioned above.